Task 4: Adding Color Resources
In this task you will learn how to create more resources like the string resources you’ve used earlier. With resources, you will be able to define values and use them across multiple parts throughout the app. In this case, color resources will be added to make changing the UI color scheme easier.
What you’ll learn:
- Implementing and adding color resources
- Defining Resources
- Layout Height and Width
Before we start, let’s go over how color is defined.
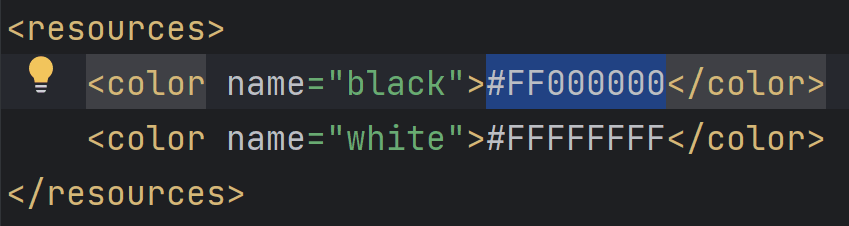
Color Definition:
- A color can be defined as 3 hexadecimals (#00 through #FF, or 0 through 255), representing the RGB (red, green, blue) values.
(Don't worry about where this code is, we will get to that in a bit. )
- A color can also be defined as an alpha value (#00 through #FF), representing the transparency (#00 = 0% = fully transparent, #FF = 100% = fully opaque). When this is included, the alpha value is the first of the four hexadecimal values (ARGB).
- Note: the colors corresponding to the code appear along the left margin of the editor.
- Tip: You can use google’s color picker to choose custom colors. It will give you the hex of it for you to copy and paste.
Step 1: Using the color resources
We will first learn how to use the predefined color resources.
- In the Project panel, navigate to res → values → colors.xml. This opens the color resource file.

Within colors.xml, you should see that some color resources have already been defined.
(Note: Different Android Studio versions may have different colors than pictured.)
- Let's head back to fragment_first.xml and choose to view its XML code from the top right of the editor.
- Add a new property called android:background anywhere inside the TextView code. Within the quotation marks, start setting the value to @color.
- A menu should pop up with the predefined colors from the color resource you opened earlier:

- Choose @color/black.
- Look for or add the property android:textColor and change its value to @android:color/white.
- The android framework has already defined some colors for you which is why we are using @android:color/.
Rerun the app and it should now look like this:

Step 2: Creating new color resources
We will now create a custom color resource.
- Back in colors.xml, create a new color resource called ScreenBackground, following the format of the predefined colors already in the file. Set the value to #FFEE58.

- Go back to fragment_first.xml and into its design layout.
- In the Component Tree, click NestedScrollView.
- Go to the Attributes panel, find the background property (or if you cannot find it, use the search bar in the panel). Select the field to the right of it (beside the eye drop) and type “c” into it. A menu should pop up.

- Choose @color/screenBackground.

- There should be a yellow color swatch of the screenBackground color to the left of the color value in the background field. Click on it.

- Upon choosing the Custom tab, a custom color picker will appear. Feel free to change the background color but note that the color resource screenBackground will remain yellow until you change its value.

Step 3: Exploring the width and height properties
Now that you know how to make color resources, we can now explore the width and height properties using them.
- In fragment_first.xml, select ConstrainedLayout in the Component Tree.
- Go to the Attributes panel and expand the Layout section.

- The layout_width and layout_height properties should be set to match_parent. The ConstraintLayout is the root view of this Fragment, thus the "parent" layout size is basically the size of your screen.
- Note: All views must have layout_width and layout_height properties.
Remember that you set the entire background to the screenBackground color:

- Select textview_first in the Component Tree. The layout width and height are predefined as wrap_content.

- wrap_content makes the view big enough to just enclose the contents plus the padding. In this case, the text.
- Let’s now change the layout width and height to match_parent.

- match_parent makes the view match the width and height of its parent (in this case, the ConstraintLayout).
- Play around with the layout width and height of not only textview_first but also button_first.
- Let’s now revert both the button and textview back to wrap_content.